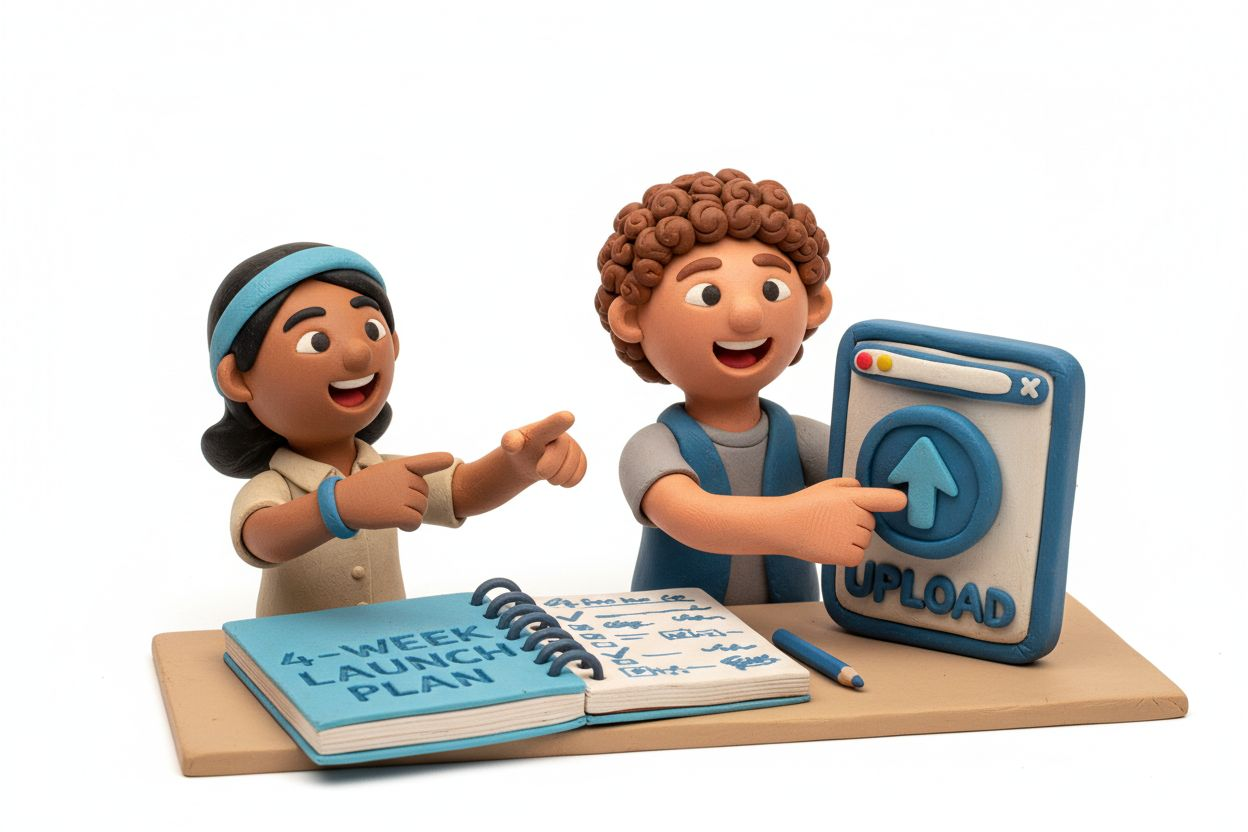
How to Get Into YouTube: Your 4-Week Launch Plan From Zero to First Upload
You have been thinking about starting a YouTube channel for months. Maybe years. You watch creators in your niche and think, "I could do that." But every time you sit down to actually start, the questions pile up. What should your channel be about? Do you need expensive equipment? How do you even set up a channel? Where do you begin?
Here's the truth: you can launch a complete YouTube channel in four weeks with just your phone and a plan. No film degree required. No professional studio. Just a clear process that takes you from idea to published video without the overwhelm.
This guide breaks down exactly what to do each week to get your channel live. By week four, you will have uploaded your first video and started building an audience on a platform with over 2 billion monthly active users.
Why YouTube Beats Other Platforms for New Creators
Before you dive into the setup process, understand what makes YouTube different from TikTok, Instagram, or other platforms.
YouTube functions as both a search engine and a recommendation engine, according to 1of10. This dual nature means your videos can get discovered years after you upload them. Someone searching "how to change a bike tire" in 2027 might find your 2025 tutorial. That doesn't happen on most social platforms where content dies in 48 hours.
The money matters too. 1of10 breaks down the math: a finance channel with a $12 CPM could earn $12,000 for 1 million views, while the same views on TikTok might generate only around $500. YouTube pays creators significantly more because of its ad revenue model.
Plus, you can start for free. OneStream points out that creating a channel, uploading videos, and using basic editing software won't cost anything. As your channel grows, you can invest in better gear, but you don't need it to start.
Week 1: Pick Your Niche and Validate Your Idea
Your first week is about decisions, not equipment. You need to figure out what your channel will be about and whether anyone actually wants to watch it.
Choose One Clear Topic
The biggest mistake new creators make is trying to cover everything. A channel about "lifestyle" or "my interests" confuses both viewers and the algorithm. Keep Calm and Chiffon explains that sticking to one topic or theme helps YouTube quickly categorize your content and recommend it to the right audience.
Pick something specific. Not "fitness" but "bodyweight workouts for people over 40." Not "cooking" but "30-minute vegetarian dinners." Not "gaming" but "indie horror game reviews."
Your niche should sit at the intersection of three things:
- Something you know enough about to create 50+ videos
- Something you genuinely enjoy talking about
- Something people are actively searching for or watching
Research What's Already Working
Spend a few hours watching channels in your chosen niche. Look for channels with 5,000 to 50,000 subscribers, not the massive ones. These mid-size creators show you what's possible for someone starting today.
Pay attention to:
- Which video titles get the most views
- How long their videos run (8 minutes? 15? 30?)
- What questions they answer in the comments
- What topics they haven't covered yet
Make a list of 20 video ideas based on what you find. If you can easily come up with 20, you have picked a good niche. If you struggle to find 10, your topic might be too narrow.
Write Down Your Channel's Core Promise
In one sentence, what will viewers get from your channel? This becomes your north star for every decision you make.
Examples:
- "I help beginner gardeners grow vegetables in small spaces."
- "I review budget tech gadgets to find the ones actually worth buying."
- "I teach basic car maintenance so you can avoid expensive mechanic bills."
Keep this sentence somewhere visible. When you're deciding whether to make a video about something, ask if it delivers on this promise.
Week 2: Set Up Your Channel and Brand
Now you build the actual channel. This week is about the technical setup and creating a visual identity that looks professional, even on a zero budget.
Create Your Google Account and Channel
If you already have a Google account, you can use it or create a new one specifically for your channel. Go to YouTube, click your profile icon, and select "Create a channel." You will choose between using your personal name or a custom name.
For most creators, a custom channel name works better. It gives you flexibility if you ever want to bring on co-hosts or sell the channel later. Pick something memorable, easy to spell, and related to your niche.
Design Your Visual Identity
You need three visual elements: a profile picture, a banner, and a color scheme.
For your profile picture, use a clear photo of your face if you will appear on camera, or create a simple logo using free tools like Canva. The image should be recognizable even at thumbnail size.
Your banner (also called channel art) appears at the top of your channel page. Include your upload schedule if you have one ("New videos every Tuesday"), your niche, and maybe one line about what viewers will learn. Keep text large and centered since the banner displays differently on phones, tablets, and computers.
Choose two or three colors you will use consistently in thumbnails and graphics. This creates visual cohesion across your content.
Write Your Channel Description
Your "About" section needs to accomplish two things: tell new visitors what your channel offers and include keywords that help YouTube understand your content.
Structure it like this:
First paragraph: What you cover and who it's for Second paragraph: Your background or why you're qualified Third paragraph: Upload schedule and how to contact you
Include your main keyword naturally. If your channel is about sourdough baking, use phrases like "sourdough bread tutorials," "beginner bread baking," and "artisan bread techniques."

Plan Your Content Calendar
Keep Calm and Chiffon recommends posting weekly videos to build an audience and establish a routine. Decide which day works for your schedule and commit to it.
Map out your first eight videos. Start with topics that answer common questions in your niche. These "evergreen" videos will continue attracting viewers long after you publish them.
Your first video should introduce you and your channel, but keep it under three minutes. Viewers don't know you yet, so they won't sit through a 15-minute origin story.
Week 3: Gather Equipment and Learn Basic Filming
You don't need thousands of dollars in gear. 1of10 notes that almost every major creator started with the bare minimum equipment. Your phone and natural light will work fine for your first videos.
Use What You Already Have
Your smartphone probably shoots better video than cameras from 10 years ago. Modern phones handle 1080p or 4K video easily. You just need to stabilize it and light yourself properly.
Keep Calm and Chiffon suggests you can start filming with just a phone propped facing a window using natural light. This setup costs nothing and produces clean, watchable footage.
Get a cheap phone tripod or prop your phone against a stack of books. The key is keeping it steady. Shaky footage makes viewers click away faster than anything else.
Master Natural Lighting
Position yourself facing a window during daytime. The soft, diffused light from a window creates flattering illumination without harsh shadows. Avoid sitting with the window behind you, which turns you into a dark silhouette.
Film during the same time of day to keep your lighting consistent across videos. Morning and late afternoon usually offer the best natural light.
If you film at night or in a room without good windows, OneStream mentions that inexpensive lights can dramatically elevate production quality. A basic LED panel costs $30-50 and solves most lighting problems.
Invest in Audio First
Here's what matters most: audio quality beats video quality every time. Viewers will tolerate mediocre video if they can hear you clearly, but perfect video with bad audio gets abandoned immediately.
Your phone's built-in microphone might work if you're close to it in a quiet room. Test it. If you hear echo, background noise, or muffled sound, you need an external microphone.
A lavalier (clip-on) mic that plugs into your phone costs $20-30 and makes a huge difference. For sit-down videos at a desk, a USB microphone works well and typically costs $50-80.
Practice Talking to the Camera
This feels weird at first. You're talking to a lens in an empty room. But you need to develop the skill of speaking naturally while looking at the camera.
Film practice takes. Don't worry about the content, just get comfortable with the process. Watch them back. Notice your verbal tics (um, uh, like, you know). Identify where you look away from the camera or lose energy.
Record a two-minute introduction to a topic in your niche. Do it five times. By the fifth take, you will sound more natural and confident.
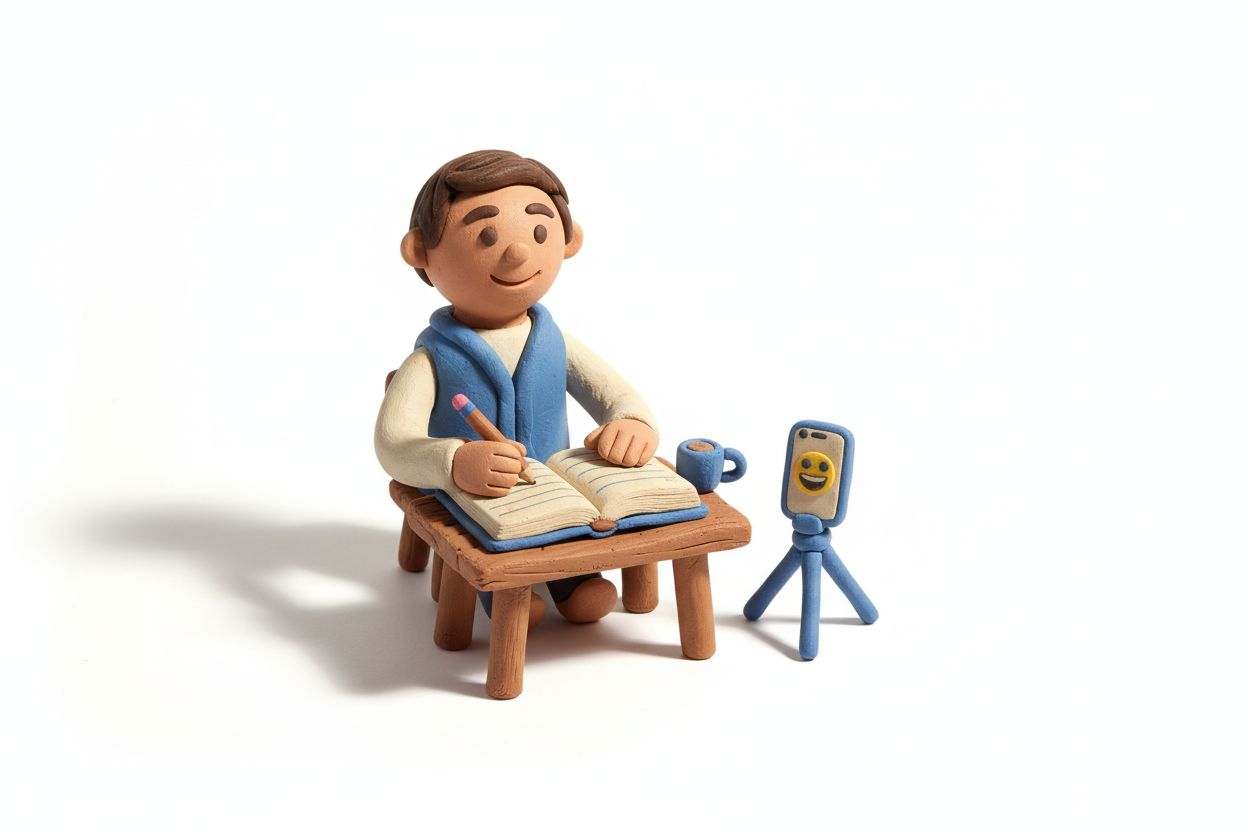
Week 4: Film, Edit, and Upload Your First Video
This is the week you actually become a YouTuber. You will create your first video from script to published upload.
Write a Simple Script or Outline
You don't need a word-for-word script unless that's how you work best. Most creators do better with a detailed outline that keeps them on track without sounding like they're reading.
Structure your first video like this:
- Hook (first 10 seconds): State the problem or promise the solution
- Introduction (20 seconds): Who you are and what this video covers
- Main content (5-8 minutes): The actual information, broken into clear sections
- Call to action (20 seconds): Ask viewers to subscribe and suggest what to watch next
Keep your first video between 6 and 10 minutes. Shorter than 6 minutes doesn't give YouTube enough watch time data. Longer than 10 minutes is hard to sustain when you're learning.
Film Your Video in One Session
Set up your space, check your lighting and audio, and film the entire video in one sitting. You will make mistakes. That's fine. Pause, collect yourself, and start that section again.
Leave a few seconds of silence before and after each section. This makes editing easier because you can see the gaps visually in your editing software.
Film multiple takes of your opening hook. This 10-second segment determines whether viewers keep watching, so it's worth getting right.
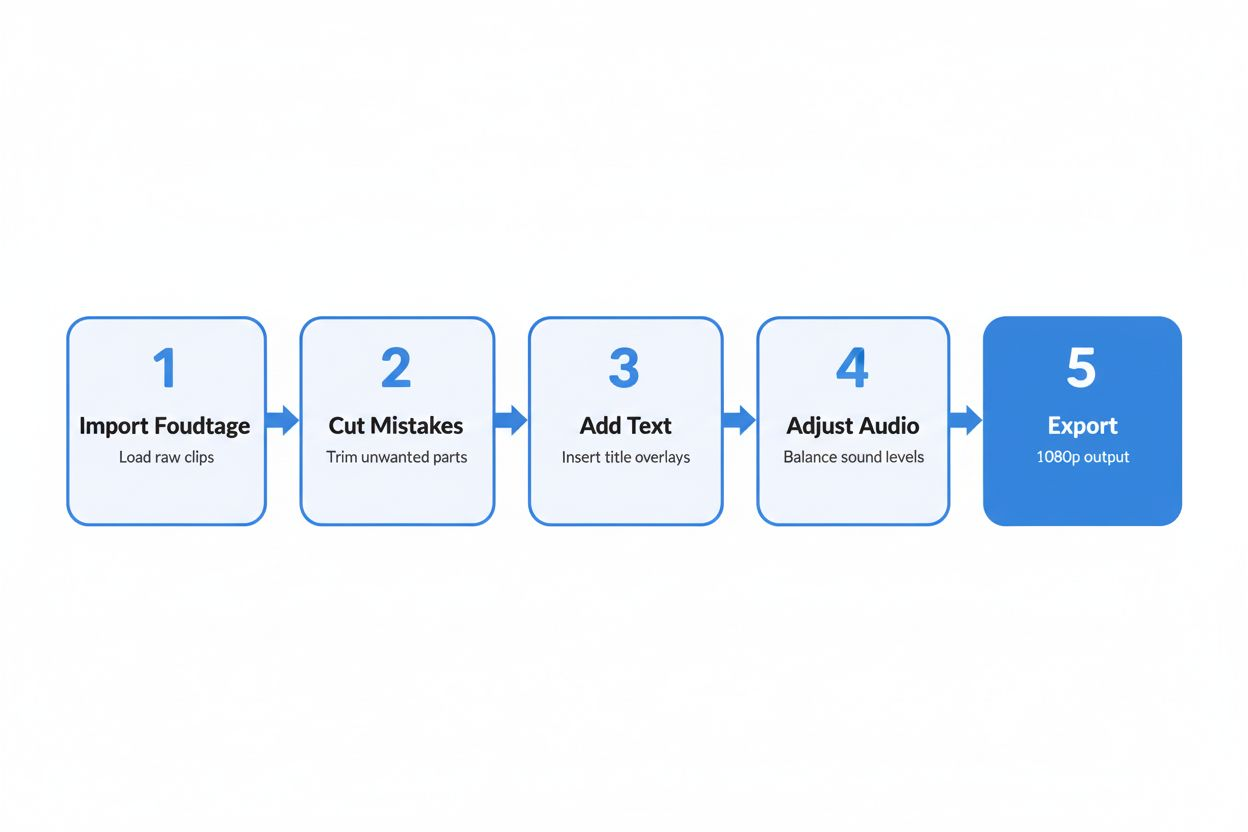
Edit for Clarity and Pace
Free editing software like DaVinci Resolve, iMovie (Mac), or CapCut works fine for beginners. You need to learn just a few basic skills: cutting out mistakes, adding simple text overlays, and adjusting audio levels.
Cut aggressively. Remove pauses, verbal stumbles, and tangents. Your edited video should feel tighter and faster than your raw footage. If a sentence doesn't add value, delete it.
Add simple text overlays to emphasize key points. When you say "the three main steps," put "3 Main Steps" on screen. This reinforces your message and keeps viewers engaged.
Make sure your audio level is consistent throughout. Nothing annoys viewers more than constantly adjusting their volume.
Create a Thumbnail That Gets Clicks
1of10 recommends using bright colors, strong contrast, and minimal text (ideally under five words) in thumbnails. Keep Calm and Chiffon adds that thumbnails should use bold text or overlays and avoid stock images — viewers want to see you.
Take a separate photo for your thumbnail during filming. Look at the camera, use an expression that matches your video's emotion (excited, surprised, serious), and make sure you're well-lit.
Use Canva or Photoshop to add text. Make it large enough to read on a phone screen. Test your thumbnail by shrinking it down to the size it appears in search results. Can you still read the text? Does it stand out?
Write Your Title and Description
Your title needs to balance two things: keywords for search and curiosity for clicks.
Formula: [Keyword phrase] + [Specific promise or hook]
Examples:
- "Sourdough Starter for Beginners: Get It Right in 7 Days"
- "Budget Gaming PC Build: $500 Complete Setup"
- "Morning Yoga Routine: 10 Minutes to Reduce Back Pain"
Your description should include:
- First two lines: What the video covers (this appears in search results)
- Timestamps for different sections
- Links to any resources you mentioned
- Your social media or website
- Relevant keywords worked in naturally
Upload and Optimize
When you upload, YouTube asks for several pieces of information. Fill out everything.
Choose a category that matches your content. Add 5-8 relevant tags (your main keyword plus variations). Select "Not made for kids" unless your content specifically targets children under 13.
Add your video to a playlist, even if it's the only video there. 1of10 explains that playlists and end screens extend watch time, which the algorithm rewards.
Add an end screen in the last 5-20 seconds of your video. Link to another video or playlist and include a subscribe button.
Hit publish. You're now a YouTuber.
Building Momentum After Your First Video
One video doesn't make a channel. The real work starts now.
Stick to Your Upload Schedule
Keep Calm and Chiffon emphasizes that posting weekly videos helps build an audience and establish a routine. Consistency matters more than perfection, especially in your first few months.
Your early videos won't be great. That's normal. Every creator's first 10 videos are rough. You improve by doing, not by waiting until you feel ready.
Mix Long-Form and Short Content
Keep Calm and Chiffon notes that long-form content is key to channel growth alongside YouTube Shorts (up to 3 minutes). Shorts can bring in new viewers who then check out your main videos.
Create Shorts by pulling interesting 30-60 second clips from your long videos. Add captions and upload them as Shorts. This repurposes your content and gives you more chances to be discovered.
Respond to Every Comment
In your first few months, you won't get many comments. Respond to every single one. This builds community and signals to YouTube that your videos generate engagement.
Ask questions in your videos to encourage comments. "What topic should I cover next?" or "Have you tried this method?" give viewers a reason to type something.
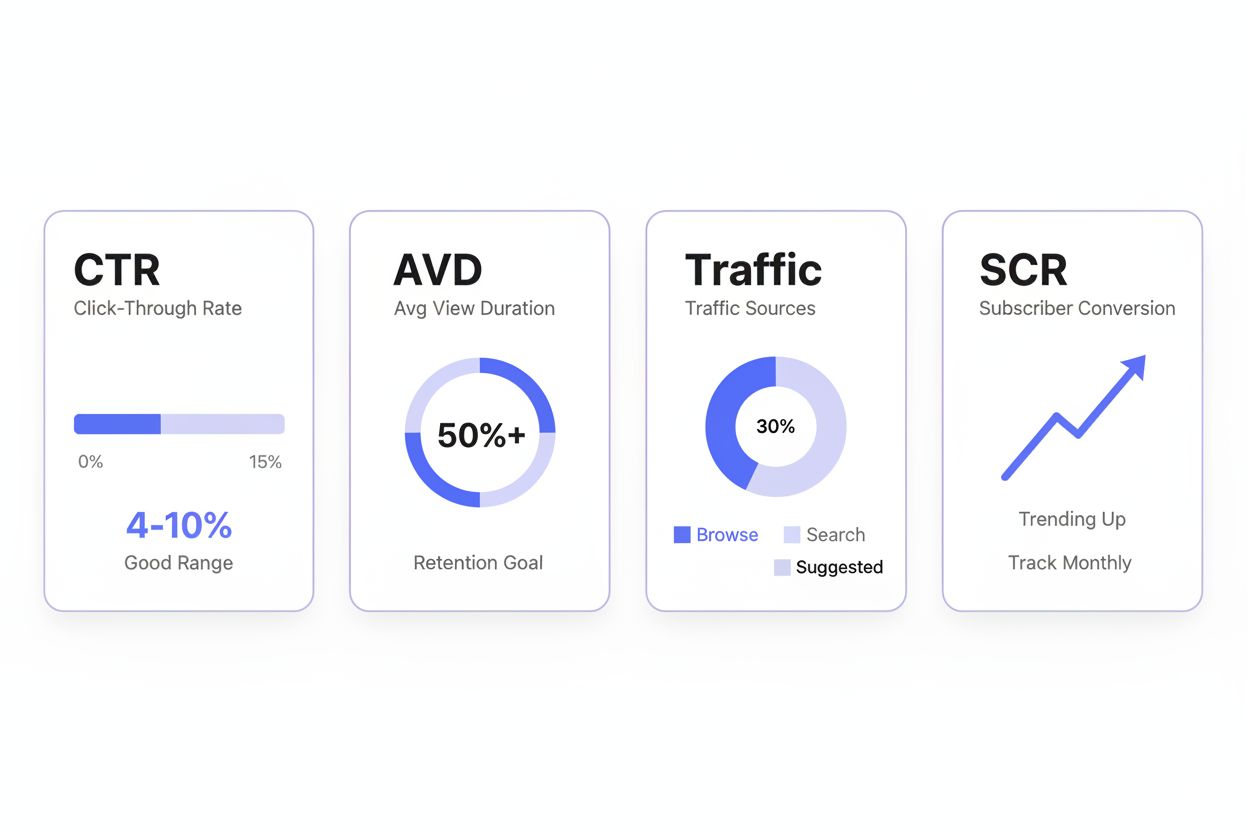
Study Your Analytics
After you have published 5-10 videos, your analytics will show patterns. Which videos get more clicks? Where do viewers drop off? What traffic sources bring in viewers?
Look at your click-through rate (CTR) and average view duration. If your CTR is low, your thumbnails and titles need work. If people click but leave quickly, your content isn't delivering on the promise or your pacing is too slow.
Improve One Thing Per Video
Don't try to fix everything at once. Pick one element to improve with each video. Better lighting. Tighter editing. Stronger hook. More confident delivery.
OneStream points out that running a YouTube channel refines filming, editing, storytelling, and marketing skills. You're building valuable abilities that compound over time.
When to Invest in Better Equipment
Start with what you have. Upgrade only when your current equipment becomes the limiting factor.
Signs you're ready to upgrade your camera:
- You're filming in low light often and your phone struggles
- You want more control over depth of field and focus
- You have monetized your channel and can justify the expense
Signs you need better audio:
- You hear echo or background noise in your current setup
- You film in different locations and need portable audio
- Viewers mention audio quality in comments
OneStream notes that a decent microphone, entry-level camera, and inexpensive lights can dramatically elevate production quality. But "dramatically elevate" doesn't mean "necessary to start." It means "nice to have once you're established."
A common upgrade path:
- Start: Phone + natural light + phone mic
- First upgrade: External microphone ($30-80)
- Second upgrade: Basic lighting ($50-100)
- Third upgrade: Dedicated camera ($400-800)
Some creators build six-figure channels using just their phone. The equipment matters less than your content, consistency, and ability to connect with viewers.
Growing Beyond the Basics
After three months of weekly uploads, you will have published 12-15 videos. This is when you can start experimenting with growth strategies.
Optimize for Search and Suggested
YouTube traffic comes from three main sources: search, suggested videos, and browse features (home page and subscriptions).
For search traffic, focus on question-based content. "How to," "what is," "best way to" videos perform well in search. Use tools like Google autocomplete or Answer the Public to find questions people ask.
For suggested traffic, create videos on topics similar to popular videos in your niche. YouTube will suggest your video to people who watched those popular ones. Study what's working for channels slightly bigger than yours and create your own version.
Collaborate With Other Small Creators
Find channels with similar subscriber counts in your niche. Reach out about collaboration. You could appear in each other's videos, create a joint project, or simply mention each other's channels.
Collaborations expose you to a new audience that's already interested in your topic. A viewer who likes Channel A will probably like Channel B if they cover similar content.
Consider Live Streaming
OneStream explains that live streaming requires channel verification and no live streaming restrictions in the past 90 days. Once you're eligible, live streams can deepen your connection with viewers.
Live content doesn't need to be elaborate. Q&A sessions, working on a project while chatting, or discussing recent news in your niche all work well. The real-time interaction builds loyalty faster than pre-recorded videos.
Expand to Other Platforms Strategically
Once you have a consistent YouTube presence, you can repurpose content for other platforms. Turn your videos into blog posts, podcasts, or Instagram Reels.
But don't spread yourself too thin early. Master YouTube first. One platform done well beats five platforms done poorly.
What Success Actually Looks Like
Your channel won't explode overnight. Most successful creators spent years building their audience.
In your first three months, celebrate these milestones:
- Publishing your first 10 videos
- Getting your first 100 subscribers
- Receiving your first positive comment from a stranger
- Having a video reach 1,000 views
In months 4-12, aim for:
- Consistent weekly uploads
- 1,000 subscribers and 4,000 watch hours (requirements for monetization)
- At least one video that performs significantly better than your average
- A clear understanding of what content your audience wants
The creators who succeed aren't the ones with the best equipment or natural charisma. They're the ones who keep showing up, keep improving, and keep publishing even when the numbers are small.
You have a four-week plan. You know what equipment you need (almost none). You understand the process from niche selection to upload. The only thing left is to start.
Week one begins now.