How to Build Your Complete YouTube Tools Stack in 2025: A Step-by-Step Workflow Guide
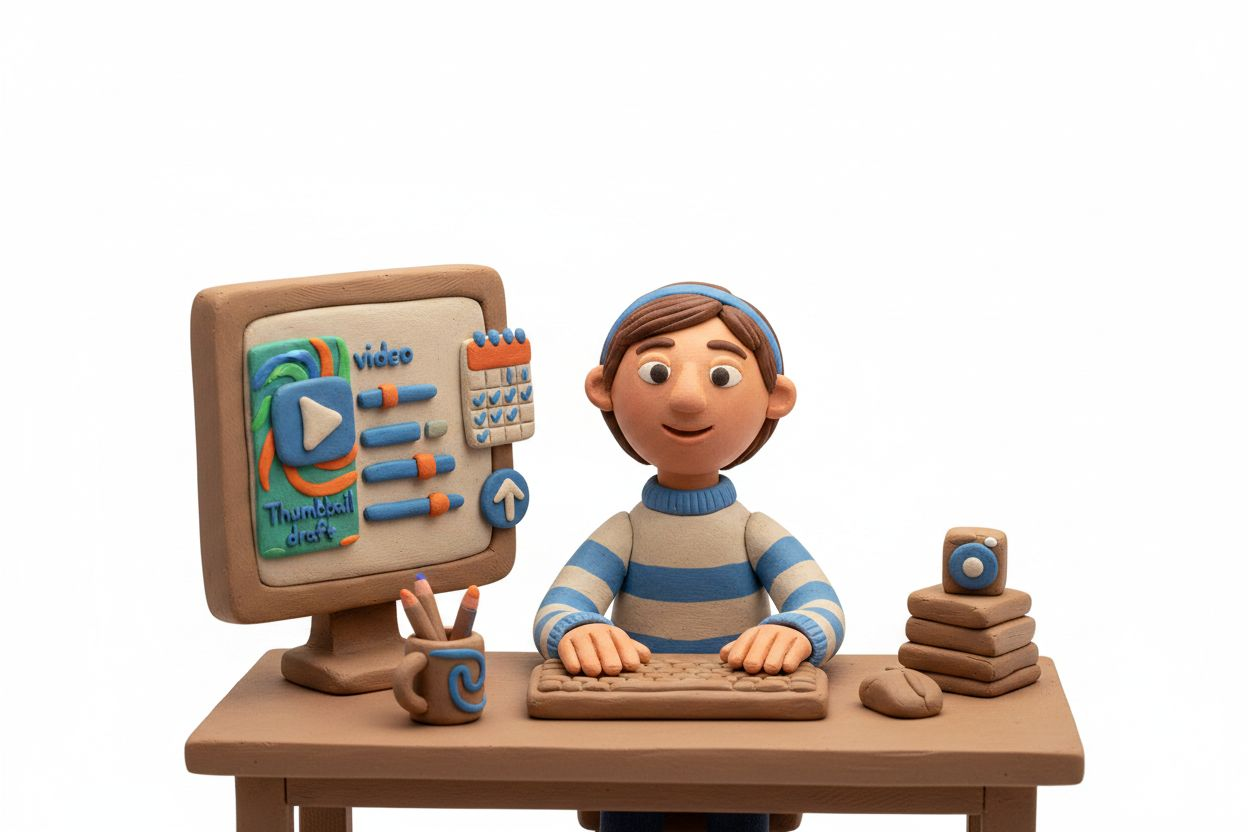
You film a video, spend hours editing, write what you think is a good title, upload it, and wait. Three days later: 47 views. Most of them probably your mom.
The problem is not your content. The problem is you are competing against 65 million YouTube creators worldwide who are posting regularly, and many of them have systems you do not. They use tools that handle the research, optimize the metadata, design the thumbnails, and schedule the uploads while they focus on making videos.
This guide walks you through building a complete YouTube tools stack from scratch. You will learn which tools to use at each stage of your workflow, how they fit together, and how to avoid paying for features you do not need. By the end, you will have a system that takes you from video idea to published content without the chaos.
Why Most Creators Waste Time on the Wrong Tools
New YouTubers make the same mistake: they download every free tool they find, try to learn five platforms at once, and end up overwhelmed. Three months later, they are still editing videos one at a time with no system for anything else.
The better approach is to build your stack in stages. Start with the essentials that directly impact whether people click and watch your videos. Add complexity only when you have proven you need it.
According to Ventress, watch time and CTR (click-through rate) are the two most important ranking signals on YouTube. That means your first priority should be tools that help you create videos people actually click on and watch all the way through. Everything else is secondary.
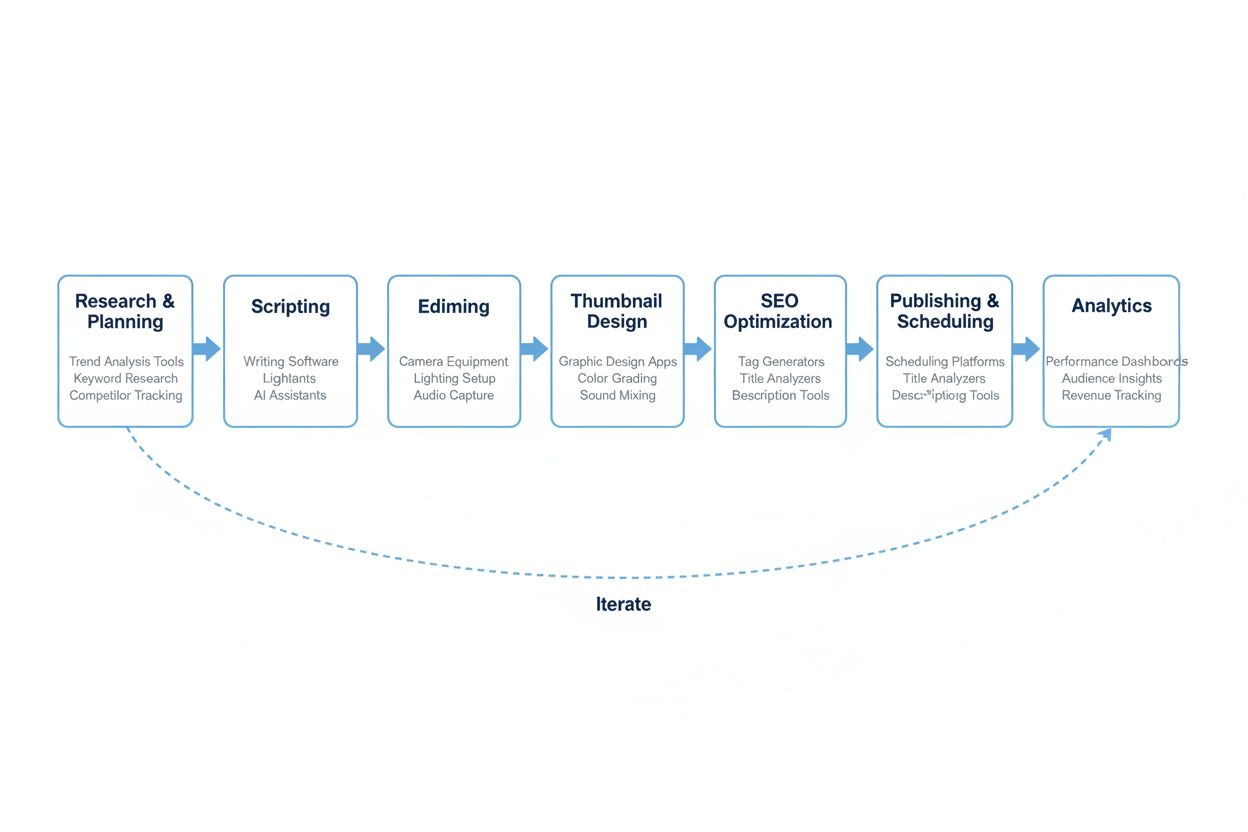
Stage 1: Research and Idea Validation (Before You Film Anything)
Most failed videos fail before you hit record. You pick a topic nobody is searching for, or you try to compete in a space where established channels dominate every result.
Research tools solve this by showing you what people are actually searching for and what competition looks like. You need two capabilities here: keyword research and competitor analysis.
Finding Topics People Search For
Start with YouTube's own search suggestions. Type a broad topic into the search bar and look at the autocomplete results. These are real queries from real users. Write down anything relevant to your niche.
Next, use a dedicated research tool. Ventress recommends a six-tool workflow that includes Ventress itself for pre-production research. The platform claims most video projects need 4-6 weeks of pre-production research, which sounds excessive until you realize that one well-researched video will outperform ten random uploads.
TubeBuddy and VidIQ both offer keyword research features. TubeBuddy shows you search volume, competition level, and a weighted score that combines both. VidIQ provides similar data plus trending topics in your niche.
The goal is not to find the highest-volume keywords. The goal is to find keywords where you can realistically rank in the top 10 results. Look for search volume above 1,000 per month and competition labeled as "low" or "medium."
Analyzing What Already Works
Once you have a topic, search for it on YouTube and study the top five results. Open each video and note:
- The title structure (how many words, what hook they use)
- The thumbnail style (faces, text overlays, colors)
- The video length
- The view count relative to the channel size
If a channel with 5,000 subscribers has a video with 50,000 views, that topic has potential. If every top result comes from channels with 500,000+ subscribers, pick a different keyword.
TubeBuddy includes a feature that analyzes competitor videos and shows you their tags, description structure, and estimated search traffic. This is not about copying. It is about understanding what the algorithm rewards for that specific topic.
Stage 2: Scripting and Pre-Production Planning
You have a validated topic. Now you need to turn it into a video that people watch all the way through.
Most creators skip scripting entirely or write a loose outline and wing it. This works if you are naturally concise and engaging on camera. Most people are not. They ramble, repeat themselves, and bury the important information under five minutes of setup.
Writing for Retention
Your script should be structured around keeping people watching. YouTube's algorithm prioritizes watch time, so a 10-minute video where people watch 8 minutes beats a 15-minute video where they watch 6 minutes.
Start with the payoff. If your video is "How to Edit Faster in Premiere Pro," your first 15 seconds should show the result: "This workflow cut my editing time from 6 hours to 2 hours per video. Here is exactly how it works."
Then outline the steps or points you will cover. Keep each section to 1-3 minutes. If a section runs longer, break it into subsections with clear transitions.
Use Google Docs or Notion for scripting. Both are free, both allow comments and version history, and both work on any device. Avoid fancy screenwriting software. You are writing a guide, not a screenplay.
Planning Visual Elements
As you write, note where you will need B-roll, screen recordings, or graphics. Mark these in your script with timestamps or brackets.
Example: "First, open the Effects panel. [SCREEN RECORDING: Show Effects panel opening] Then search for Lumetri Color. [SCREEN RECORDING: Type 'Lumetri' in search bar]"
This planning saves hours during editing. You will know exactly what footage you need before you start cutting.

Stage 3: Editing Tools That Match Your Skill Level
Editing is where most creators get stuck. They download DaVinci Resolve because it is free and professional, then spend three weeks learning how to do a basic cut.
Your editing tool should match your current skill level and the type of content you make. Do not optimize for hypothetical future needs.
For Beginners: Descript
Ventress includes Descript in their recommended six-tool workflow. Descript lets you edit video by editing the transcript. You delete words, and the corresponding video disappears. You rearrange sentences, and the video rearranges.
This is perfect for talking-head content, interviews, or tutorials where you are explaining something on camera. It is terrible for highly visual content like travel vlogs or action sequences.
Descript also includes automatic filler word removal. It detects every "um," "uh," and "like" and lets you delete them all with one click. This feature alone saves hours.
The free version limits you to one hour of transcription per month. The paid version ($12/month) gives you unlimited transcription plus overdub (AI voice generation to fix mistakes without re-recording).
For Intermediate Creators: Adobe Premiere Pro or Final Cut Pro
If you need more control over visual effects, color grading, or multi-cam editing, you need a traditional non-linear editor.
Premiere Pro ($22.99/month) works on Windows and Mac. It integrates with After Effects for motion graphics and Audition for audio cleanup. The learning curve is steep, but thousands of YouTube tutorials exist for every feature.
Final Cut Pro ($299 one-time purchase) is Mac-only. It is faster than Premiere on Apple Silicon chips and has a more intuitive interface. The one-time cost is cheaper than Premiere if you plan to use it for more than a year.
Both are overkill if you are making simple videos. Both are necessary if you are doing complex projects with multiple layers, effects, and precise timing.
For Mobile Creators: CapCut
If you film on your phone and want to edit on your phone, CapCut is the best free option. It includes transitions, text animations, and trending effects without watermarks.
The interface is designed for vertical video, which makes it ideal for YouTube Shorts. You can export horizontal video too, but the workflow is clearly optimized for mobile-first content.
CapCut is owned by ByteDance (the company behind TikTok), so it includes features specifically designed for short-form content: auto-captions, beat-synced cuts, and trending audio.
Stage 4: Thumbnail Design (The Most Important 2 Hours You Will Spend)
Your thumbnail determines whether anyone clicks on your video. According to Ventress, CTR is one of the two most important ranking signals. A video with a 2% CTR needs 50 impressions to get one view. A video with a 10% CTR needs only 10 impressions.
Most creators treat thumbnails as an afterthought. They screenshot a random frame from the video, add some text in Impact font, and upload it. Then they wonder why nobody clicks.
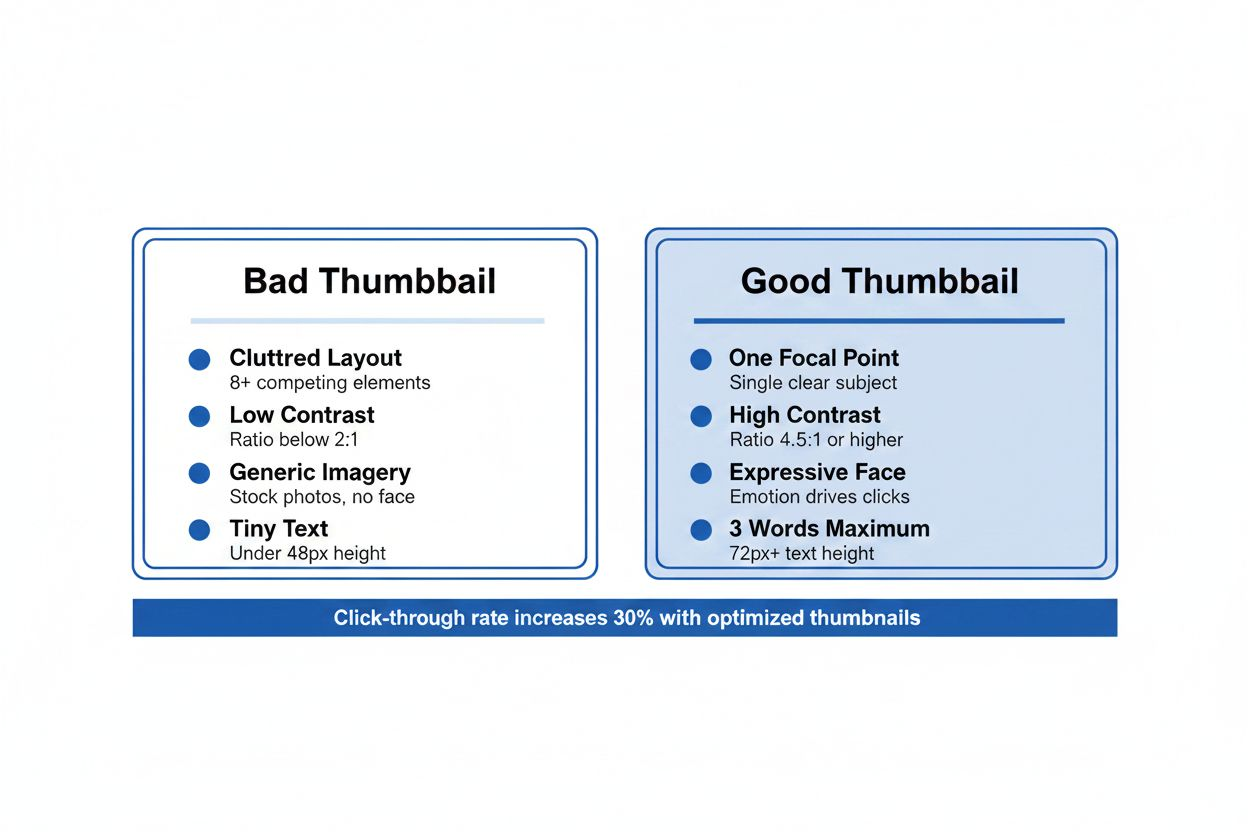
The Thumbnail Formula That Works
Effective thumbnails follow a pattern:
- One clear focal point (usually a face with an exaggerated expression)
- 3-5 words of text maximum
- High contrast between background and foreground
- Bright, saturated colors that stand out in a feed
Study thumbnails from MrBeast, Marques Brownlee, or Ali Abdaal. They all follow this formula. The text is huge. The faces are expressive. The composition is simple.
Using Canva for Thumbnail Design
Ventress recommends Canva as part of the core six-tool workflow. Canva includes YouTube thumbnail templates that are already sized correctly (1280x720 pixels).
Start with a template, replace the background image with a screenshot from your video, and customize the text. Use bold, sans-serif fonts (Montserrat, Bebas Neue, or Anton). Make the text at least 100pt so it is readable on mobile screens.
Canva's free version includes enough features for basic thumbnails. The Pro version ($12.99/month) adds background removal, which is useful if you want to cut yourself out of the video frame and place yourself on a custom background.
Testing Thumbnails Before You Publish
Create three thumbnail options for every video. Show them to someone who has never seen your content and ask which one they would click on. Do not explain the video. Just show the thumbnails.
The one they pick is usually not the one you like best. Use it anyway. Your taste does not matter. Clicks matter.
Stage 5: SEO Optimization (Making YouTube Understand Your Video)
You have a great video and a clickable thumbnail. Now you need to tell YouTube what your video is about so it can show it to the right people.
This is where most creators either over-optimize (keyword stuffing) or under-optimize (leaving fields blank). The goal is to give YouTube enough context without sounding robotic.
Writing Titles That Rank and Get Clicks
Your title needs to do two things: include your target keyword and make people curious enough to click.
Bad title: "Premiere Pro Tutorial" Better title: "How to Edit Videos 3x Faster in Premiere Pro (2025 Workflow)"
The better title includes the keyword ("Premiere Pro"), promises a specific benefit ("3x Faster"), and adds recency ("2025 Workflow"). It is 9 words, which is short enough to display fully on mobile.
Front-load your keyword. YouTube weighs words at the beginning of the title more heavily than words at the end.
Descriptions That Actually Help
Your description should include:
- Your target keyword in the first sentence
- A 2-3 sentence summary of what the video covers
- Timestamps for each major section
- Links to tools or resources mentioned
- A call-to-action (subscribe, check out another video, etc.)
Do not stuff keywords. Write for humans first. If your description sounds like a robot wrote it, people will not read it, and YouTube's algorithm will not reward it.
Tags: Less Important Than You Think
Tags matter less than they did five years ago. YouTube's algorithm is good enough now to understand your video from the title, description, and actual content.
That said, include 5-10 relevant tags. Use your exact target keyword, a few variations, and a couple of broader category tags.
TubeBuddy and VidIQ both have tag suggestion features. They analyze top-ranking videos for your keyword and show you which tags those videos use. This is helpful for finding variations you might not think of.
Using TubeBuddy or VidIQ for Optimization
Both tools offer browser extensions that add SEO features directly to YouTube's upload page. As you type your title and description, they show you:
- A weighted score for how well-optimized your metadata is
- Suggestions for improving your title
- Tag recommendations
- Search volume and competition data for your keyword
TubeBuddy also analyzes monetization opportunities by looking at video performance and audience behavior. If you are trying to make money from YouTube, this data helps you identify which types of videos generate the most revenue per view.
VidIQ includes a "Competitors" feature that shows you other channels in your niche and alerts you when they upload new videos. This is useful for staying on top of trends and seeing what topics are working for similar creators.
Both offer free versions with limited features. Both have paid tiers ($7.50-$39/month) that unlock bulk processing, A/B testing, and advanced analytics.
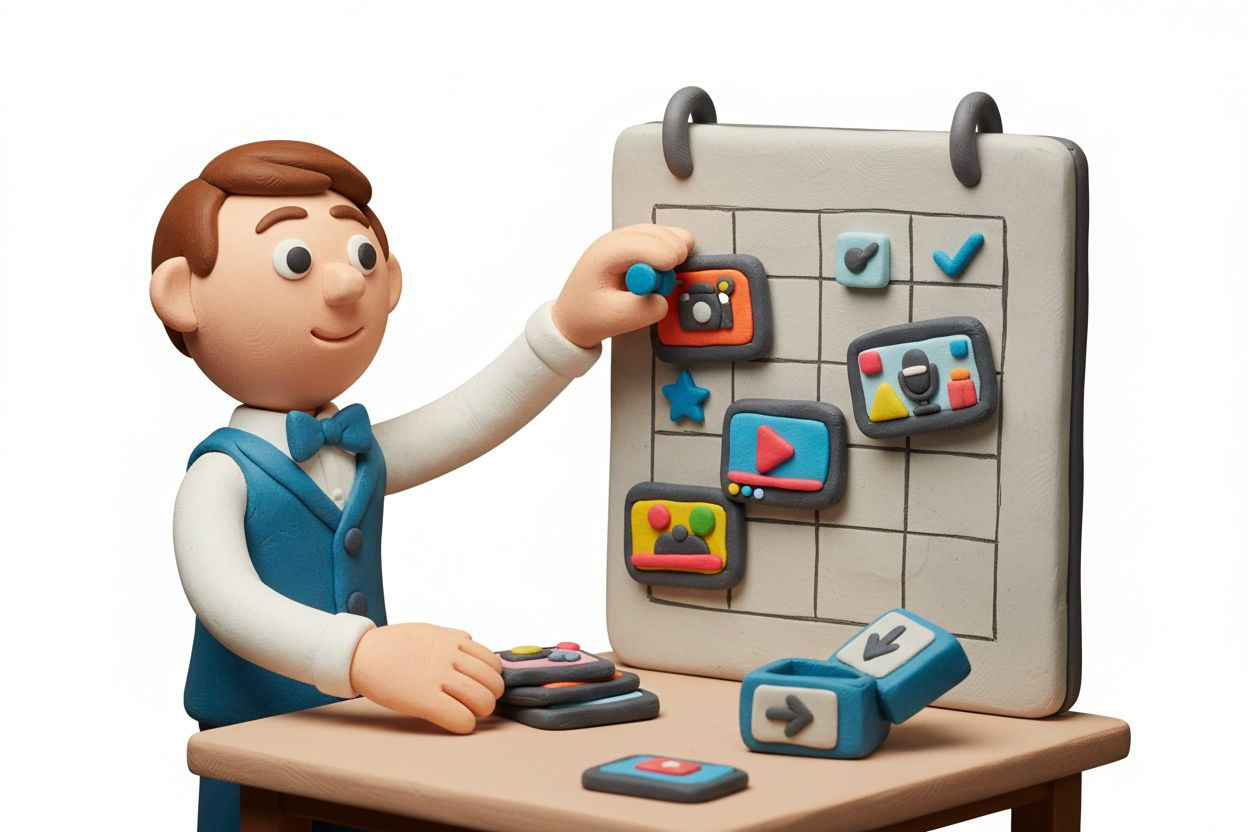
Stage 6: Scheduling and Publishing Strategy
You have a finished video, optimized metadata, and a great thumbnail. When should you publish it?
The answer depends on when your audience is online. YouTube Studio shows you this data in the Analytics tab under "When your viewers are on YouTube."
Most creators find that their audience is most active in the evening (6-9 PM) in their primary timezone. Publishing 1-2 hours before peak time gives your video a chance to accumulate some early engagement before the algorithm pushes it to more people.
Using YouTube Studio for Scheduling
YouTube Studio includes a built-in scheduler. When you upload a video, select "Schedule" instead of "Public" and choose your publish date and time.
This is all you need for basic scheduling. You do not need a third-party tool unless you are managing multiple channels or want to cross-post to other platforms simultaneously.
Cross-Posting to Other Platforms
If you are repurposing your YouTube content for Instagram, TikTok, or Twitter, you need a tool that can publish to multiple platforms at once.
Later, Buffer, and Hootsuite all support video scheduling across multiple platforms. Later ($25/month) is the most visual and includes a preview of how your content will look on each platform. Buffer ($6/month per channel) is the cheapest. Hootsuite ($99/month) is overkill unless you are managing a team.
For most solo creators, the free versions of these tools are enough. You get limited posts per month, but that is fine if you are only posting once or twice per week.
Stage 7: Analytics and Iteration (The Feedback Loop)
Publishing is not the end of your workflow. It is the beginning of the feedback loop.
Every video you publish generates data. YouTube Studio shows you:
- Impressions (how many times your thumbnail was shown)
- CTR (what percentage of people clicked)
- Average view duration (how long people watched)
- Traffic sources (where viewers came from)
These metrics tell you what is working and what is not.
Reading the Data Correctly
If your CTR is below 4%, your thumbnail or title is not compelling enough. People are seeing your video but choosing not to click.
If your average view duration is below 40%, your content is not holding attention. People are clicking but leaving quickly. This usually means your intro is too slow, your pacing is off, or you are not delivering on the promise of your title.
If your impressions are low (under 1,000 in the first 48 hours), YouTube is not confident about who to show your video to. This usually means your metadata is too vague or you are targeting a keyword with no search volume.
Using Analytics to Improve Your Next Video
Look at your top three performing videos. What do they have in common?
- Similar topics?
- Similar thumbnail styles?
- Similar video lengths?
- Similar traffic sources?
Double down on what works. If your tutorial videos consistently outperform your vlogs, make more tutorials. If videos under 10 minutes get better retention than videos over 15 minutes, keep them short.
TubeBuddy and VidIQ both include analytics features that go beyond YouTube Studio. They show you:
- Which videos are gaining or losing views over time
- Which videos are bringing in the most subscribers
- Which videos are generating the most revenue (if you are monetized)
This data helps you identify patterns that are not obvious from YouTube Studio alone.
Stage 8: Monetization Tools (When You Are Ready to Make Money)
Once you hit 1,000 subscribers and 4,000 watch hours, you can apply for the YouTube Partner Program and start earning ad revenue. But ad revenue is not the only way to make money from YouTube.
Getting Paid Faster with Advance Funding
According to AIR Media-Tech, MilX gives creators access to up to six months of future AdSense income instantly. Instead of waiting 60 days for YouTube to pay you, you can get cash upfront to reinvest in equipment, ads, or other growth expenses.
Creators using MilX reportedly grow 1.4x faster than those who do not, likely because they can reinvest earnings immediately instead of waiting months. The platform supports 40+ currencies and 10+ payout methods, including crypto.
This type of tool is useful if you are in a growth phase and cash flow is limiting your ability to produce better content. It is not useful if you are just starting out with minimal revenue.
Tracking Sponsorships and Brand Deals
As your channel grows, brands will reach out with sponsorship offers. You need a system to track these deals: who contacted you, what they offered, what you agreed to, and when payment is due.
A simple spreadsheet works for most creators. Include columns for:
- Brand name
- Contact person and email
- Offer amount
- Video deadline
- Payment terms
- Status (negotiating, agreed, completed, paid)
If you are managing multiple sponsorships per month, consider a CRM like Notion or Airtable. Both let you create custom databases with filters, tags, and automated reminders.
Building Your Stack in Phases (Do Not Buy Everything at Once)
Here is the recommended order for adding tools to your workflow:
Phase 1 (First 10 videos):
- YouTube Studio (free, built-in)
- Canva (free version for thumbnails)
- Your phone or basic camera
- Free editing software (iMovie, DaVinci Resolve, or CapCut)
Phase 2 (After you have published consistently for 3 months):
- TubeBuddy or VidIQ (free version)
- Descript or Premiere Pro (if editing is taking too long)
Phase 3 (After you hit 1,000 subscribers):
- Paid version of TubeBuddy or VidIQ ($7.50-$15/month)
- Canva Pro (if you are making frequent thumbnails)
Phase 4 (After you are monetized and making $500+/month):
- Advanced analytics tools
- Sponsorship tracking system
- Advance funding tools like MilX (if cash flow is limiting growth)
The mistake most creators make is buying everything in Phase 1. They spend $100/month on tools before they have proven they can publish consistently. Then they quit after three months because the costs add up and the revenue is not there yet.
Start minimal. Add tools only when you have a specific problem that a tool solves.

Common Tool Stack Mistakes to Avoid
Mistake 1: Using Too Many Tools at Once
Every tool you add creates another login to remember, another interface to learn, and another monthly bill. Most creators need 3-5 tools maximum. If you are using more than that, you are probably duplicating functionality.
Mistake 2: Paying for Features You Do Not Use
TubeBuddy and VidIQ both offer bulk processing features that let you update metadata across dozens of videos at once. This is useful if you have 200 videos and want to add end screens to all of them. It is useless if you have 10 videos.
Before you upgrade to a paid plan, list the specific features you need. If you are only using the free features, do not pay for the premium version.
Mistake 3: Ignoring YouTube Studio
YouTube Studio is free, built into the platform, and includes everything you need for basic analytics, scheduling, and community management. Many creators pay for third-party tools that duplicate features YouTube Studio already offers.
Check YouTube Studio first. If it does what you need, you do not need another tool.
Mistake 4: Optimizing Before You Have Content
SEO tools are useless if you have only published three videos. You do not have enough data to know what is working. You do not have enough content for the algorithm to understand your channel.
Focus on publishing consistently first. Add optimization tools after you have 20-30 videos and can see patterns in what performs well.
Your First 30 Days with a New Tools Stack
Here is a realistic timeline for implementing a new workflow:
Week 1: Set up your core tools (YouTube Studio, Canva, editing software). Create templates for thumbnails and video descriptions.
Week 2: Research and plan your next 5 videos. Use keyword research to validate topics. Write outlines or scripts.
Week 3: Film and edit your first video using your new workflow. Time how long each step takes. Identify bottlenecks.
Week 4: Publish your first video with optimized metadata and a custom thumbnail. Schedule your next video. Start researching video #3.
By the end of 30 days, you should have published 2-3 videos and have a clear sense of where your workflow is slow or frustrating. That is when you add tools to solve specific problems.
What Success Actually Looks Like
A good tools stack does not make you go viral. It does not guarantee views. What it does is remove friction from your workflow so you can focus on making better content.
Success looks like:
- Publishing on a consistent schedule without scrambling at the last minute
- Spending 80% of your time on content, 20% on optimization and admin
- Knowing which videos are working and why
- Having a system that scales as your channel grows
The 65 million YouTube creators who are publishing regularly are not all more talented than you. Many of them just have better systems. They have workflows that turn ideas into published videos without chaos.
Build your stack one tool at a time. Test each addition for at least a month before adding the next one. Focus on consistency over perfection. The algorithm rewards creators who show up regularly with improving content, not creators who publish one perfect video every three months.
Your tools should make the work easier, not more complicated. If a tool is slowing you down or adding stress, remove it. The best tools are the ones you actually use.